The best way to learn about Active Directory environments is to build one. In this guide, I walk through the process I used to:
- Build a Domain Controller (Windows Server 2025).
- Create two Windows 11 client machines.
- Join those client machines to the AD Domain.
- Create and test user accounts (both local and AD accounts).
- Configure AD services like DNS, Group Policy, and User Management.
This project mirrors a real-world AD setup and serves as an ideal starting point for exploring more advanced AD services later.
1️⃣ Prerequisites
- Software:
- VMware Workstation Pro (or any preferred hypervisor).
- Windows Server 2025 ISO.
- Windows 11 Enterprise ISO.
- System Requirements:
- At least 16GB RAM.
- At least 100GB free disk space.
- Accounts/Email: Dummy or actual (for downloading ISOs from Microsoft Eval Center).
2️⃣ Getting the ISOs
✅ Windows Server 2025:
- Go to Microsoft Evaluation Center and download the ISO.
- Save it in a
VMsdirectory.
✅ Windows 11 Enterprise:
- Do the same and save in the
VMsdirectory.
3️⃣ Creating the Virtual Machines
Domain Controller (Windows Server 2025)
- Create a new VM:
- Name:
Test_DC - 4 CPUs, 2GB RAM
- UEFI as Firmware
- Name:
- Install Windows Server 2025 (Standard Evaluation, Desktop Experience).
- Set Administrator password.
Client Machines (Windows 11)
- Create 2 new VMs:
- Name:
Win11User1 - Name:
Win11User2
- Name:
- Install Windows 11 using the ISO.
- Finish installation and configure a basic user account for each.
4️⃣ Domain Controller Configuration
Install AD Domain Services
- Open Server Manager ➔ Add Roles & Features.
- Install:
- Active Directory Domain Services
- DNS Services
- Promote the server to a Domain Controller:
- Domain Name:
test.local - Create New Forest.
- Domain Name:
- Set Directory Services Recovery Mode (DSRM) password.
Static IP
Assign a Static IP:
- IP Address: The IP assigned via DHCP.
- Subnet Mask:
255.255.255.0 - Default Gateway: Your local network’s IP.
- Primary DNS:
127.0.0.1(loopback for DC itself). - Alternate DNS:
8.8.8.8
5️⃣ Client Configuration
Rename Clients
Rename the client PCs:
- Client 1 ➔
WIN11USER1 - Client 2 ➔
WIN11USER2
Set DNS
Point Client Machines’ Preferred DNS to:
- The IP of the Domain Controller.
- Alternate DNS:
8.8.8.8(Google)
Join Domain
On Client Machines:
- Open Access work or school account.
- Click ➔ Connect ➔ Join a Domain (
test.local). - Enter Domain Admin Credentials.
- Restart Client.
6️⃣ User Management
Creating Domain Users
On the Domain Controller:
- Open Active Directory Users and Computers.
- Create new Users:
WIN11USER1➔WIN11USER1@test.localWIN11USER1➔WIN11USER2@test.local
- Assign initial passwords and set
Password Never Expiresfor lab setup.
Testing Logins
- Log out from Client Admin Account.
- Log in as
test.local\WIN11USER1. - Confirm access and test AD policies.
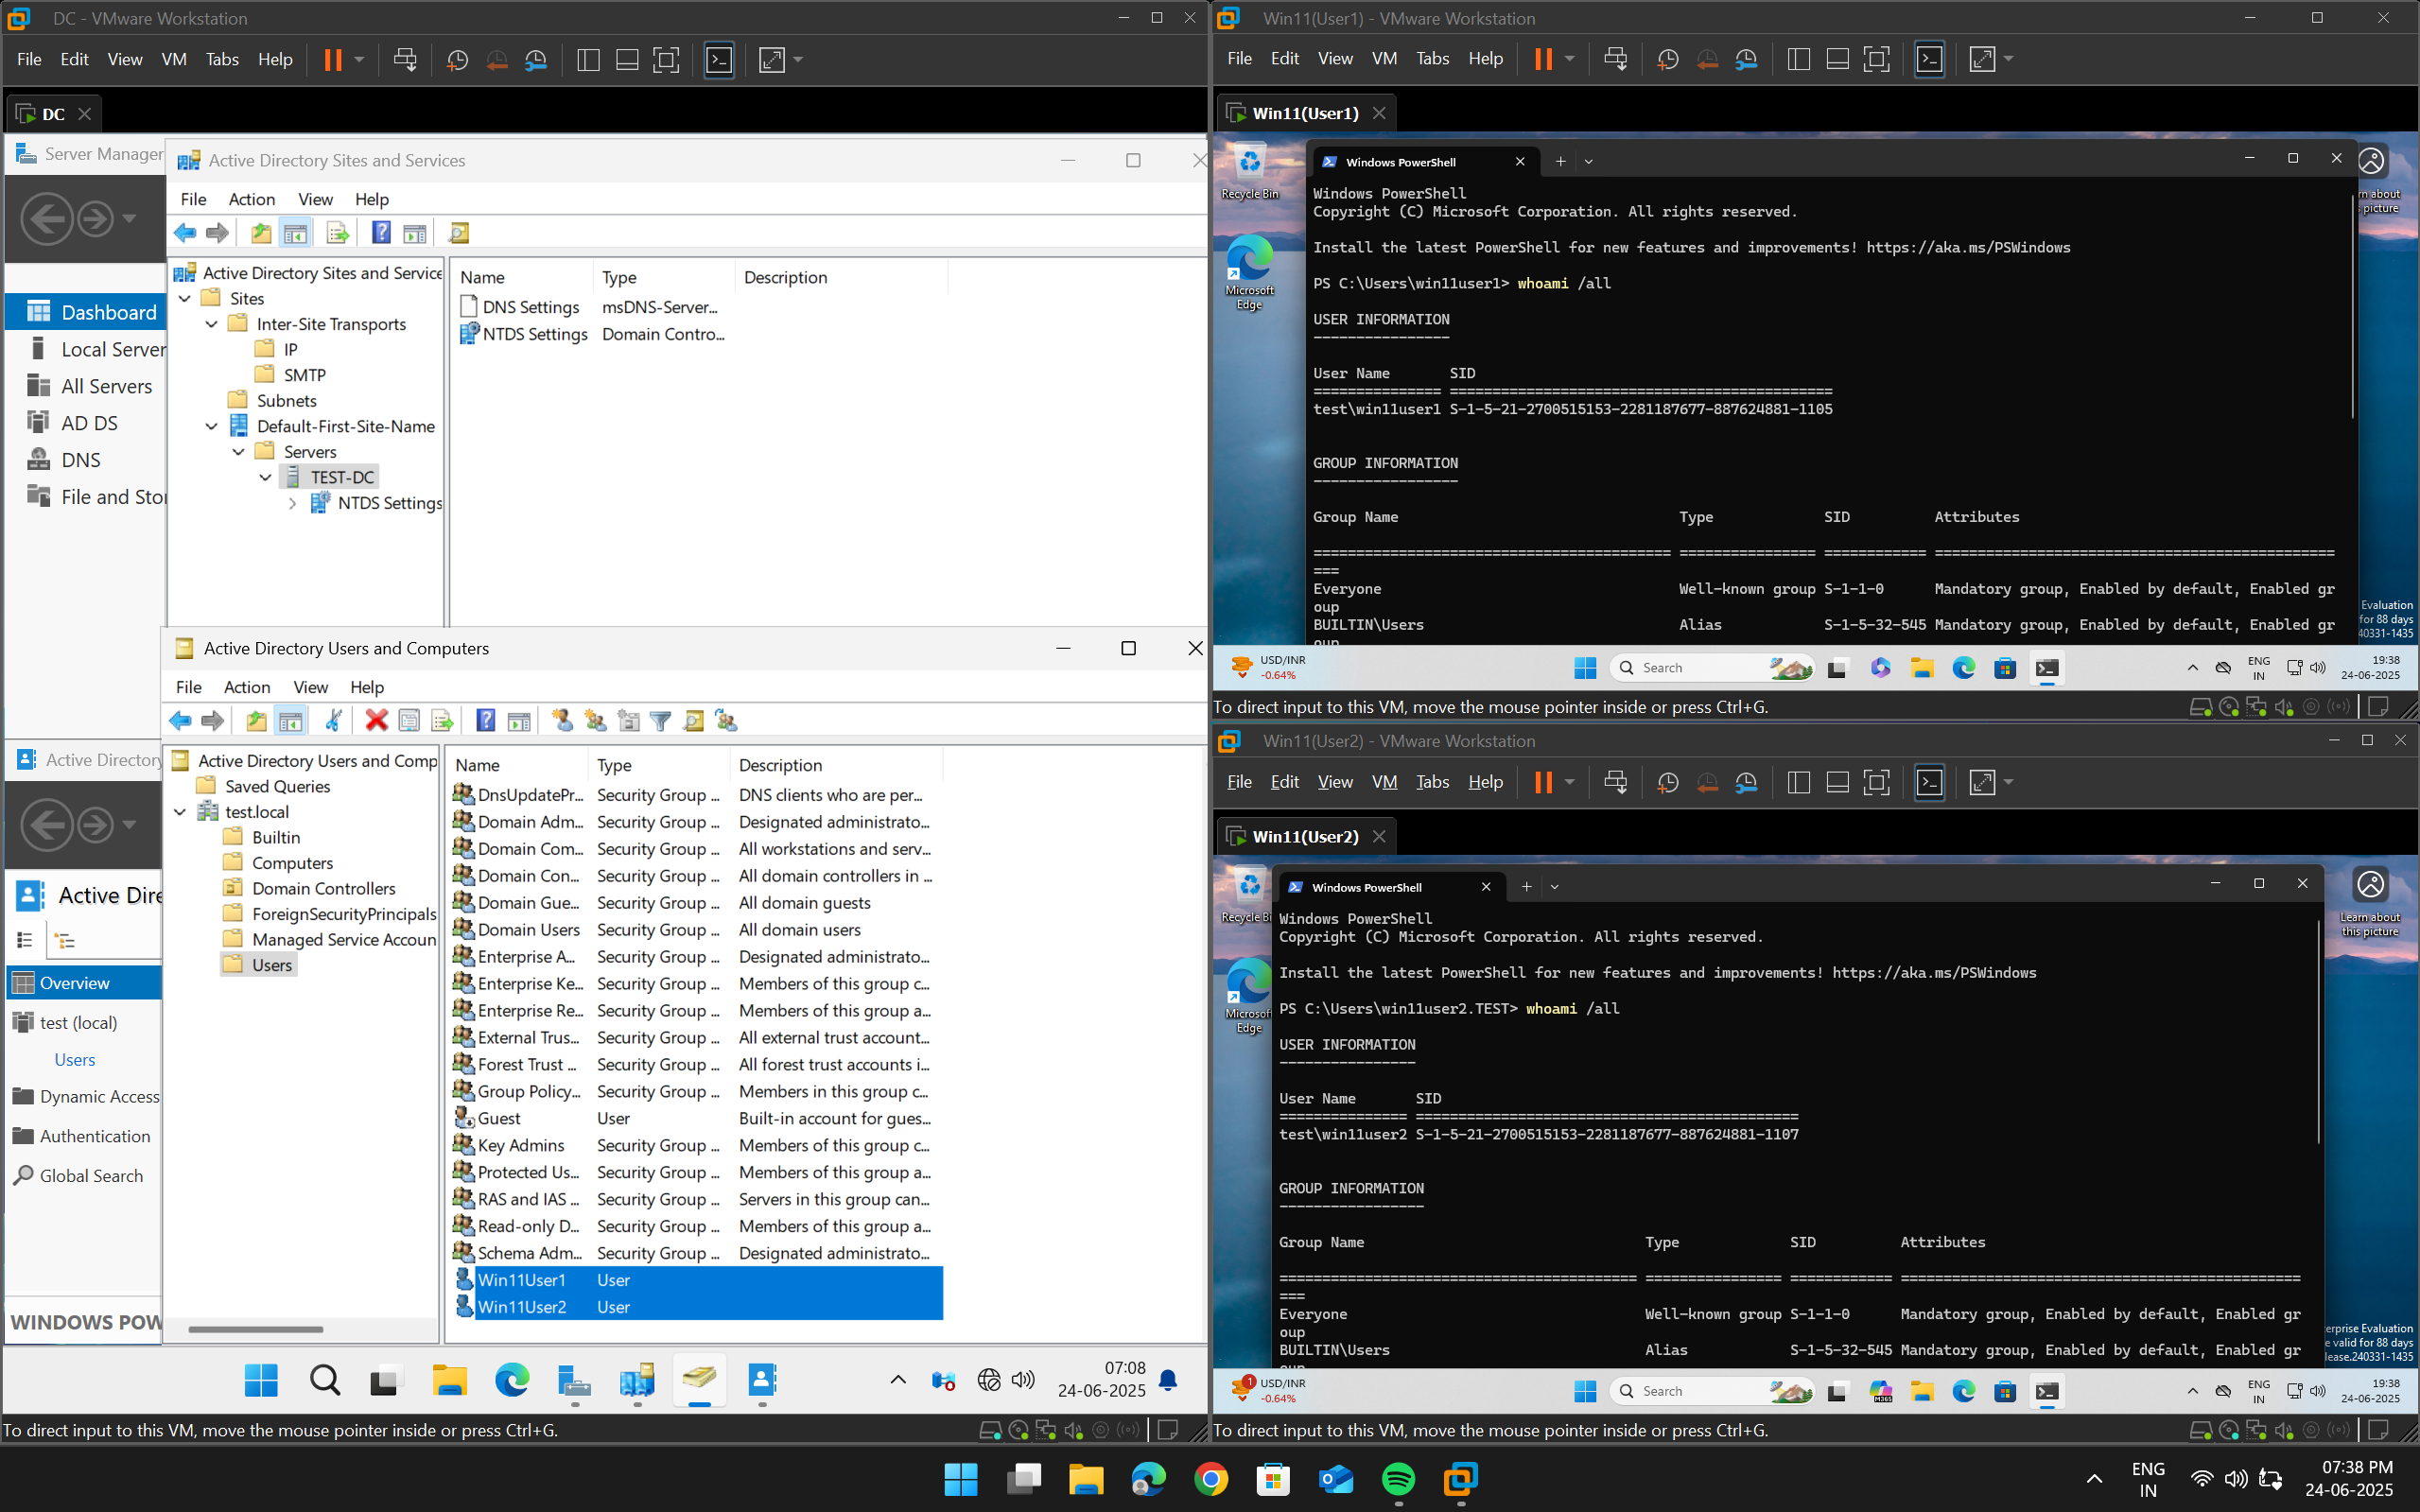
7️⃣ Final Testing and Verification
✅ Confirm:
- Client Machines can log in with AD user accounts.
- Client Machines can ping Domain Controller.
- User Accounts appear in Active Directory Users and Computers.
- Group Policy and AD Services work.
8️⃣ Outcome
With this setup, I’ve built:
- A fully functioning AD environment.
- Created, configured, and tested user accounts and group policies.
- Created a foundation for future labs, such as:
- AD Group Policy Objects (GPO).
- AD Permission Testing.
- Service Account Management.
9️⃣ What I accomplished in Part 1:
- Built a virtual Active Directory lab environment
- Installed and configured Windows Server as a Domain Controller
- Created user accounts and organizational units for testing
- Ensured network connectivity and domain joining of virtual machines
- Took snapshots for safe, repeatable testing
This virtual environment will serve as my testbed for safely developing and validating the automation scripts.